Over the past couple of months we have written several articles about MSIX, and for good reason. Not only has MSIX replaced MSI as Microsoft’s app packaging format, but it is also materially better than MSI. By using MSIX with App Attach, Windows Virtual Desktop, and FSLogix, the process of migrating, upgrading, and keeping your apps up-to-date, in a timely and efficient manner and without productivity loss, has never been easier or more achievable.
This post will serve to show how easy it is to take existing MSIs, or setup.exes, and turn them into an MSIX — of course including the required digital signature and App Attach support — using Access Capture. You can either follow along with me as I explain each step in the 20 minute demo video (in reality, the entire process only takes a few minutes) below or jump to the steps (timestamps of the video in parenthesis) you are interested in using in the written steps below.
{% video_player “embed_player” overrideable=False, type=’scriptV4′, hide_playlist=True, viral_sharing=False, embed_button=False, autoplay=False, hidden_controls=False, loop=False, muted=False, full_width=False, width=’1280′, height=’720′, player_id=’37765196351′, style=” %}
Let’s go through the steps in detail.
Main Dashboard
As you can see in the video, the Access Capture dashboard displays real-time notifications of the tasks and jobs that are operating currently, ranging from MSI packages, AppV sequences, and MSIX packages to the automated testing and launching of those packages. The dashboard captures the performance measurements of those as well.
 As mentioned earlier, the digital signature is an important and required part of creating an MSIX. Our tool not only allows you to create MSIXs from both MSIs and setup.exes, but it also ensures that the digital signature is completed and signed.
Initial Settings For Creating An MSIX
To start your MSIX creation process, we will go the the initial settings and digital signature (2:10). From the main dashboard menu on the left, go to Admin-> Environment-> Details, which brings you to the “Environment Details” screen on the right, where you click on “MSIX Package Creation” to bring up the option “edit settings” (2:36).
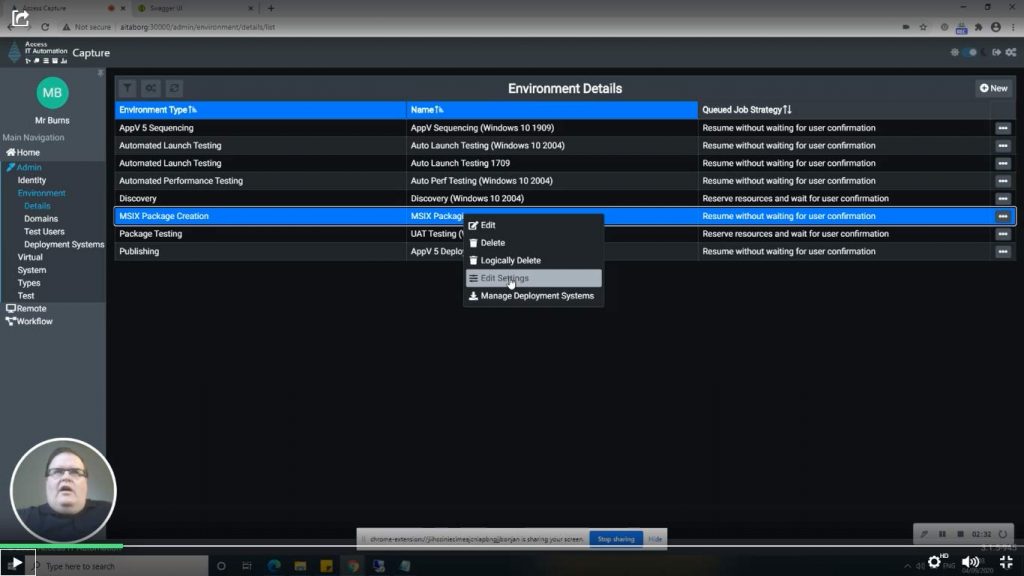
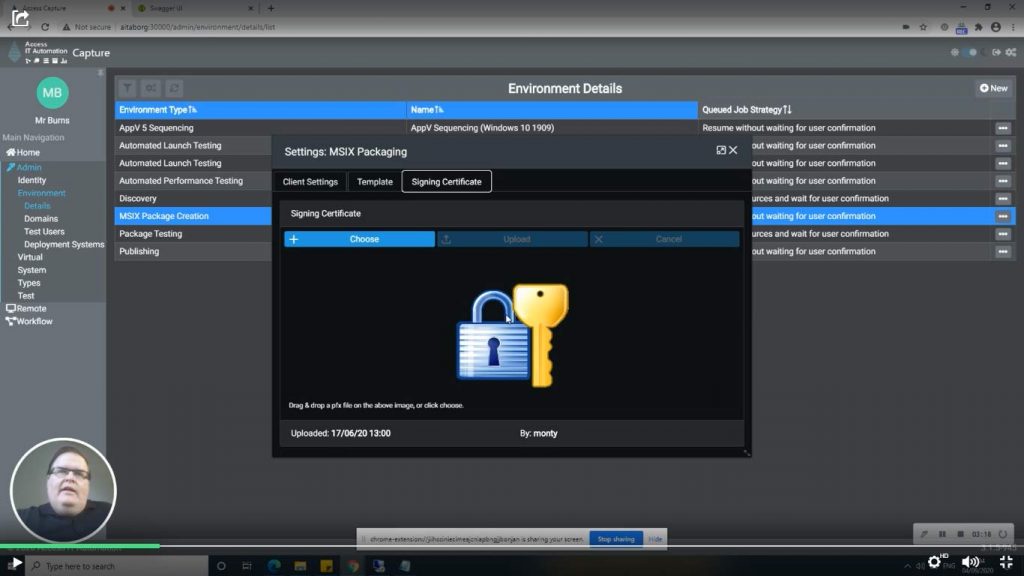
The settings option brings up three tabs listed below:
- Client Settings – The output of where the job will be sent to.
- Template – This is the MSIX template. Microsoft has their own, and most companies will have their own, so any exclusions or customizations can be made.
- Signing Certificate – Add your own PFX file. You can drag and drop the file here, and the tool adds it to the end of the MSIX package with your publisher ID.
Creating An MSIX Workflow
After you have your settings and signature setup, you can go straight into making an MSIX package. From the dashboard menu, go to Workflow-> MSIX Creation-> Start new job (3:41), which brings up the “MSIX Package Creation” screen with the following settings listed below.
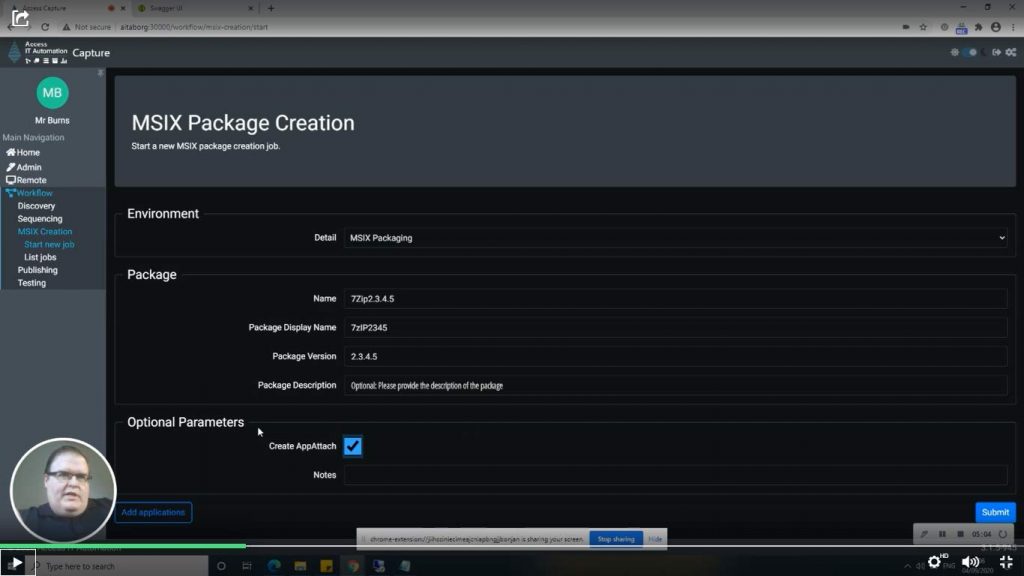
- Environment
- Detail – MSIX packaging template and digital signature
- Package
- Name – Name of product, version number, etc.
- Package Display Name – How you want it to be displayed
- Package Version – MSIX versions must have 4 digits. This requirement is different from any other packaging for MSI or AppV.
- Package Description – Optional description for more detail
- Optional Parameters
- Create App Attach – Checking the box will have the tool create a VHD file, a mountable virtual disk.
- Notes – Any additional notes for the file you want to record
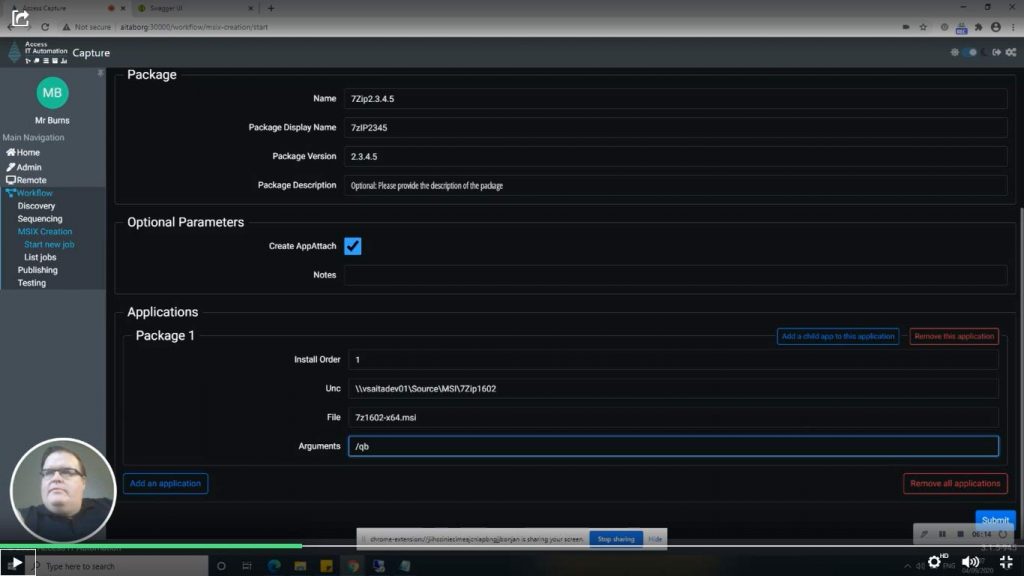
- Add an application (click on to bring up options) (5:05) *See note below
- Install Order – If putting multiple apps into the MSIX, this specifies the order
- UNC – Path of the source file, which can be an MSI or setup.exe. This can be done in bulk with multiple paths and files because the product is fully API-driven.
- File – The name of the file
- Arguments –
- Click Submit – Starts the job of creating an MSIX
Note: (5:47) You can add multiple applications in the install order to create an MSIX package that has multiple files, i.e. package name could be called financial software suite, which has tax, bookkeeping, etc.
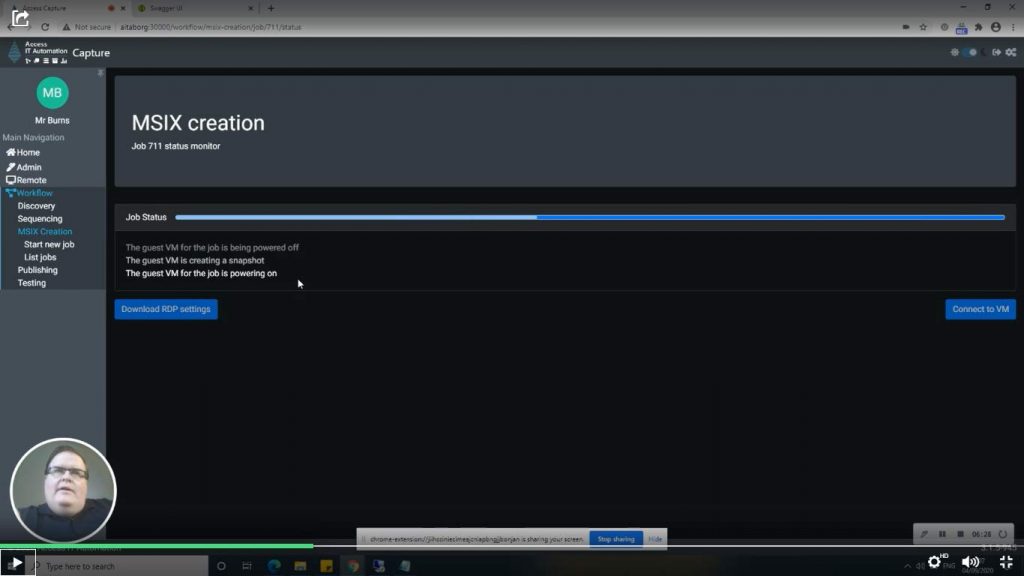
Background Processes While MSIX Is Being Created
The next phase of the video shows the process of the virtual machine being turned on, updated, the package created, and installed, as well as looking into the backend of the automated part of the process to show what is happening. The next few paragraphs are some of the key moments from that section.
(6:20) The console shows you the status of the job and the processes running in the background. The synopsis of the inputs are provided and the APIs connect with the virtual machine hypervisor, which the tool manages, so a clean virtual machine is returned with the Access client installed on it. The source files we specified earlier are loaded onto the virtual machine and are ready for MSIX creation.
(8:31) A clean snapshot of the machine is taken in case it needs to be reverted to that point. This is done to update the machine with the latest updates from Microsoft, so it is fully patched and up-to-date, in line with an Evergreen IT process.
(10:24) At this point in the video, I show you the output of a previous package that has been completed, and highlight the publisher ID/digital signature.

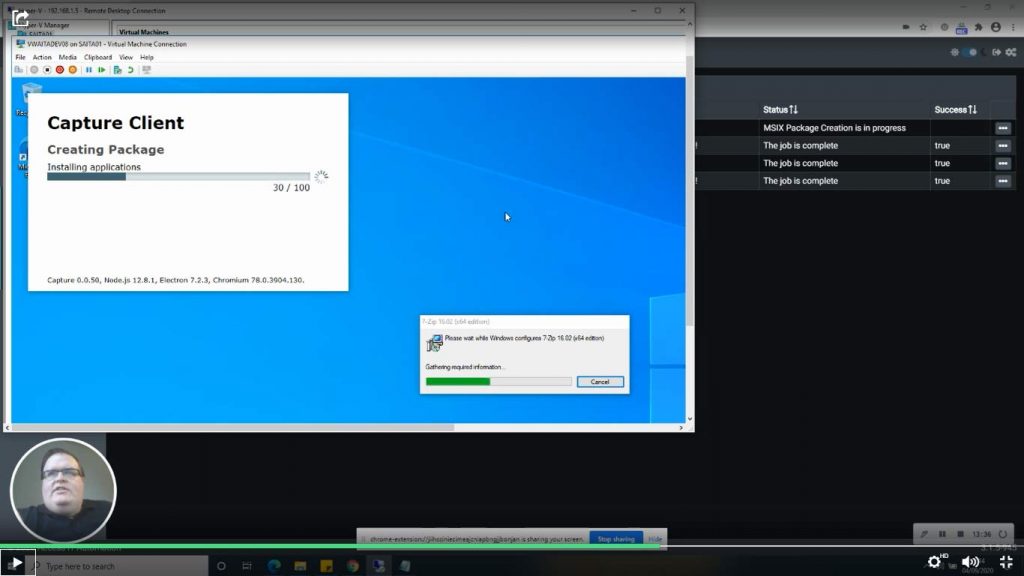
(11:48) Access Capture utilizes the Electron client, which is used in applications like Microsoft Teams, to apply the Access Capture’s automation. The automated process creates the MSIX package, creates the file format, and takes the snapshot. This process is generally done by a large packaging team that gathers source data and existing package content and then manually applies that to a process.
The automation provided by Access Capture allows this process to be done not only for one app, but for multiple apps, and at scale. It is only limited by the amount of virtual machines you have available to be used.
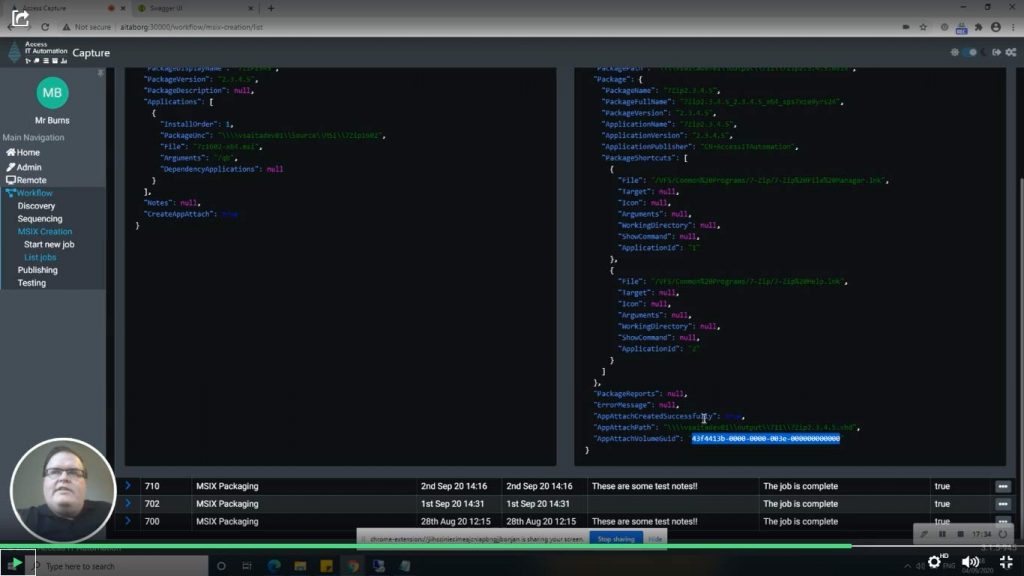
(13:23) Any dependency applications would have been installed as well as part of the process. The package is then signed and the App Attach VHD is created and mounted. An important note about the creation of the VHD is that you set the permissions on the folder.
(16:57) The App Attach path to the VHD is complete along with the name. Additionally, the tool captures the App Attach volume ID, the GUID, which is specific to that application. This is important because this is how you will manage this application in groups like Active Directory, Intune, etc. and assign users to this specific GUID.
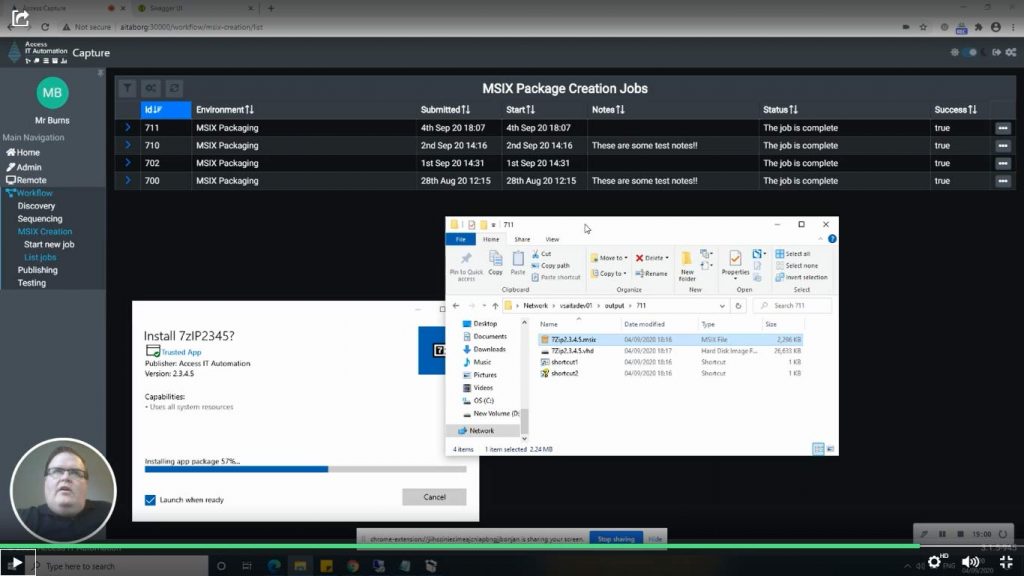
Install And Uninstall Of The MSIX
(18:37) Here in the video I install the application using the newly created MSIX, which goes extremely quickly. I also then (19:20) uninstall the application, which is a much cleaner uninstall, faster, and more efficient than MSI.
To get more details on the process of creating the MSIX package, and to learn how long the process took, please watch the video in its entirety, or click below to get a personalized demo of our product.
Want to know more about the future of application packaging and testing? Download our free eBook: