It’s time to end the confusion and help you simplify your IT projects through Windows 10 Deployment Rings.
Much to the relief of many IT project managers and their project resources, Microsoft recently announced that it would align its Windows 10 Servicing upgrade cycle with release cycles of Office 365 and SCCM.

This will not only make upgrading much easier and more cost-effective, but it will also allow organizations to streamline their planning, preparation, and training efforts on Windows 10 and Office 365 at the same time. The software giant also clarified that it would support each version for exactly 18 months — which, for most companies, will lead to a yearly, instead of a semi-annual, upgrade process.
Now that the dust of the Windows 10 Servicing timeline confusion has settled a little and organizations are in the process or have recently completed their initial Windows 10 migration, new questions emerge. For example:
- If the initial migration took more than 18 months, how will we manage to roll out the latest version at least once a year, if not twice a year?
- How can we keep business disruption and user distraction to an absolute minimum?
- How do we make sure all employees can adopt the appropriate service channel for their needs promptly?
That is where the concept of “deployment rings” come into play.
What Are Deployment Rings?
Microsoft defines them “as a method by which to separate machines into a deployment timeline. […] Each deployment ring should reduce the risk of issues derived from the deployment of the feature updates by gradually deploying the update to entire departments.”
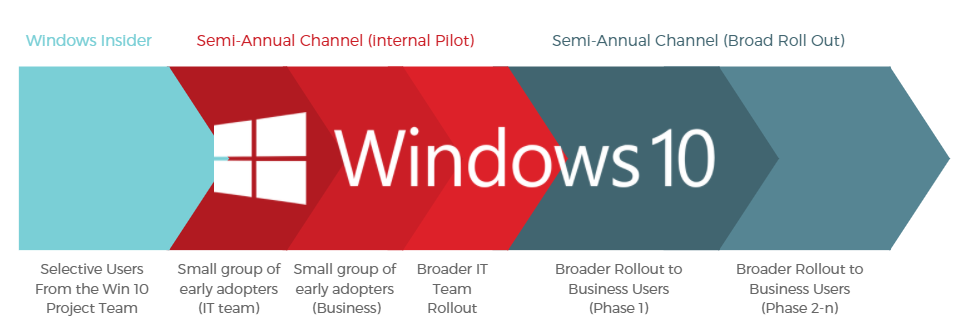
In other words, you divide all end users into groups according to their needs and schedule their migration accordingly:
- Very few Windows 10 migration project team resources will be on the Windows Insider Program to preview the upcoming functionality on the latest version.
- Once the new version is released into the Semi-Annual Channel, a small group of IT pros will spearhead your larger upgrade process by being enrolled into the IT Pilot Ring.
- After this initial test (about four weeks), a few tech-savvy business users will test drive the new OS as part of the Business User Pilot Ring.
- Once these pilots have been successfully completed, you can roll out this update to your broader IT organization. This allows you to work our any kinks in the upgrade process as well as lock down any security or privacy concerns that you might have.
- Until version 1017, Microsoft republished the already released version into what was then called the Current Branch for Business four months after the initial release date. This meant that it was deemed to be ready for an enterprise-wide rollout by Microsoft. However, Microsoft has now decided to leave it up to each organization when they have completed internal pilot phase and are ready to upgrade the rest of your business users.
- If your user base is extensive, you have capacity restraints, or you need to proceed in phases for other reasons, you can add more deployment rings to phase out your larger business user rollout.
This is just one way you can divide up your users. Another way would be to group them by locations and risks. Let’s say, for example, we have 1,000 users with 1,000 machines spread across 3 locations and 5 business units. They all need to receive the latest version of Windows 10. You could proceed as follows:
- Deploy Ring 1: First 5% of all lowest-risk users and computers in all business units in all 3 locations
- Deploy Ring 2: Next 20% of users and computers just in 2 locations (low-risk users)
- Deploy Ring 3: Next 25% of users and computers in all locations but only the business units that are back office
- Deploy Ring 4: Next 20% of users and computers that are medium risk across all locations (HR and finance)
- Deploy Ring 5: Remaining 30% of users and computers in all locations
In other words, by mapping out your users into deployment rings, you can assign a logical breakdown of your entire rollout that anticipates and accommodates your needs and circumstances.
How Do You Assign Users To Their Ring?
While the concept of deployment rings is straightforward enough, the question of how to manage the assignment of your users is an entirely different one. But before we get into the logistical considerations, let’s have a look at how to assign a user from a technical perspective according to Microsoft.
You can deploy Windows Service Channel updates using Windows Update for Business, Windows Server Update Services (WSUS), or the System Center Configuration Manager (SCCM). However, according to Microsoft, regardless of which method you choose to deploy a new Windows 10 version to your environment, “you must start the Windows 10 servicing process by creating collections of computers that represent your deployment rings.”
To do so, you can, for example, configure the Windows Update for Business Group Policy settings as explained in this Windows IT Center article:
“To use Group Policy to manage quality and feature updates in your environment, you must first create Active Directory security groups that align with your constructed deployment rings. Most customers have many deployment rings already in place in their environment, and these rings likely align with existing phased rollouts of current patches and operating system upgrades.”
While the technical implementation is simple enough, the logistical considerations are an entirely different story. Most organizations will use spreadsheets to maintain the deployment ring information. For many organizations, the implementation of an SCCM is too costly or they are running an outdated version. Some large enterprises have bespoke deployment solutions in place or use third-party tools.
This leaves a lot of questions:
- How do you decide which users go into which rings?
- Is there a way to automate the assignment based on a predefined set of rules?
- Can you enable your users to volunteer to be upgraded earlier according to their schedule?
- How do you do this on a larger scale and in an Evergreen fashion?
Let’s have a look at that next.
Evergreen IT: The Need To Enable Self-Service & Automation
Even if you could hit freeze on all your IT environment changes for the time you need to upgrade all your users to the next Windows 10 version, it would be complicated enough. But unfortunately, you cannot. Change is the only thing that is always constant: employees leave or get hired, laptops break and have to be replaced, and new applications are added to your portfolio.
Therefore many organizations decided to swim with the stream, rather than against it, and adopt a “Business-as-Usual” or “Evergreen IT” way of managing IT. However, that requires the right processes, technology, and organizational changes to make that happen. In terms of Windows 10 Service management, this means primarily two things: empower your users to self-service as much and as frictionless as possible and automate the rest.
Before you can start deploying a new Windows update to anyone, you first need to re-certify your applications to ensure they will run on the lastest OS version. This can be done very quickly and efficiently by leveraging CAPTURE in Evergreen mode.
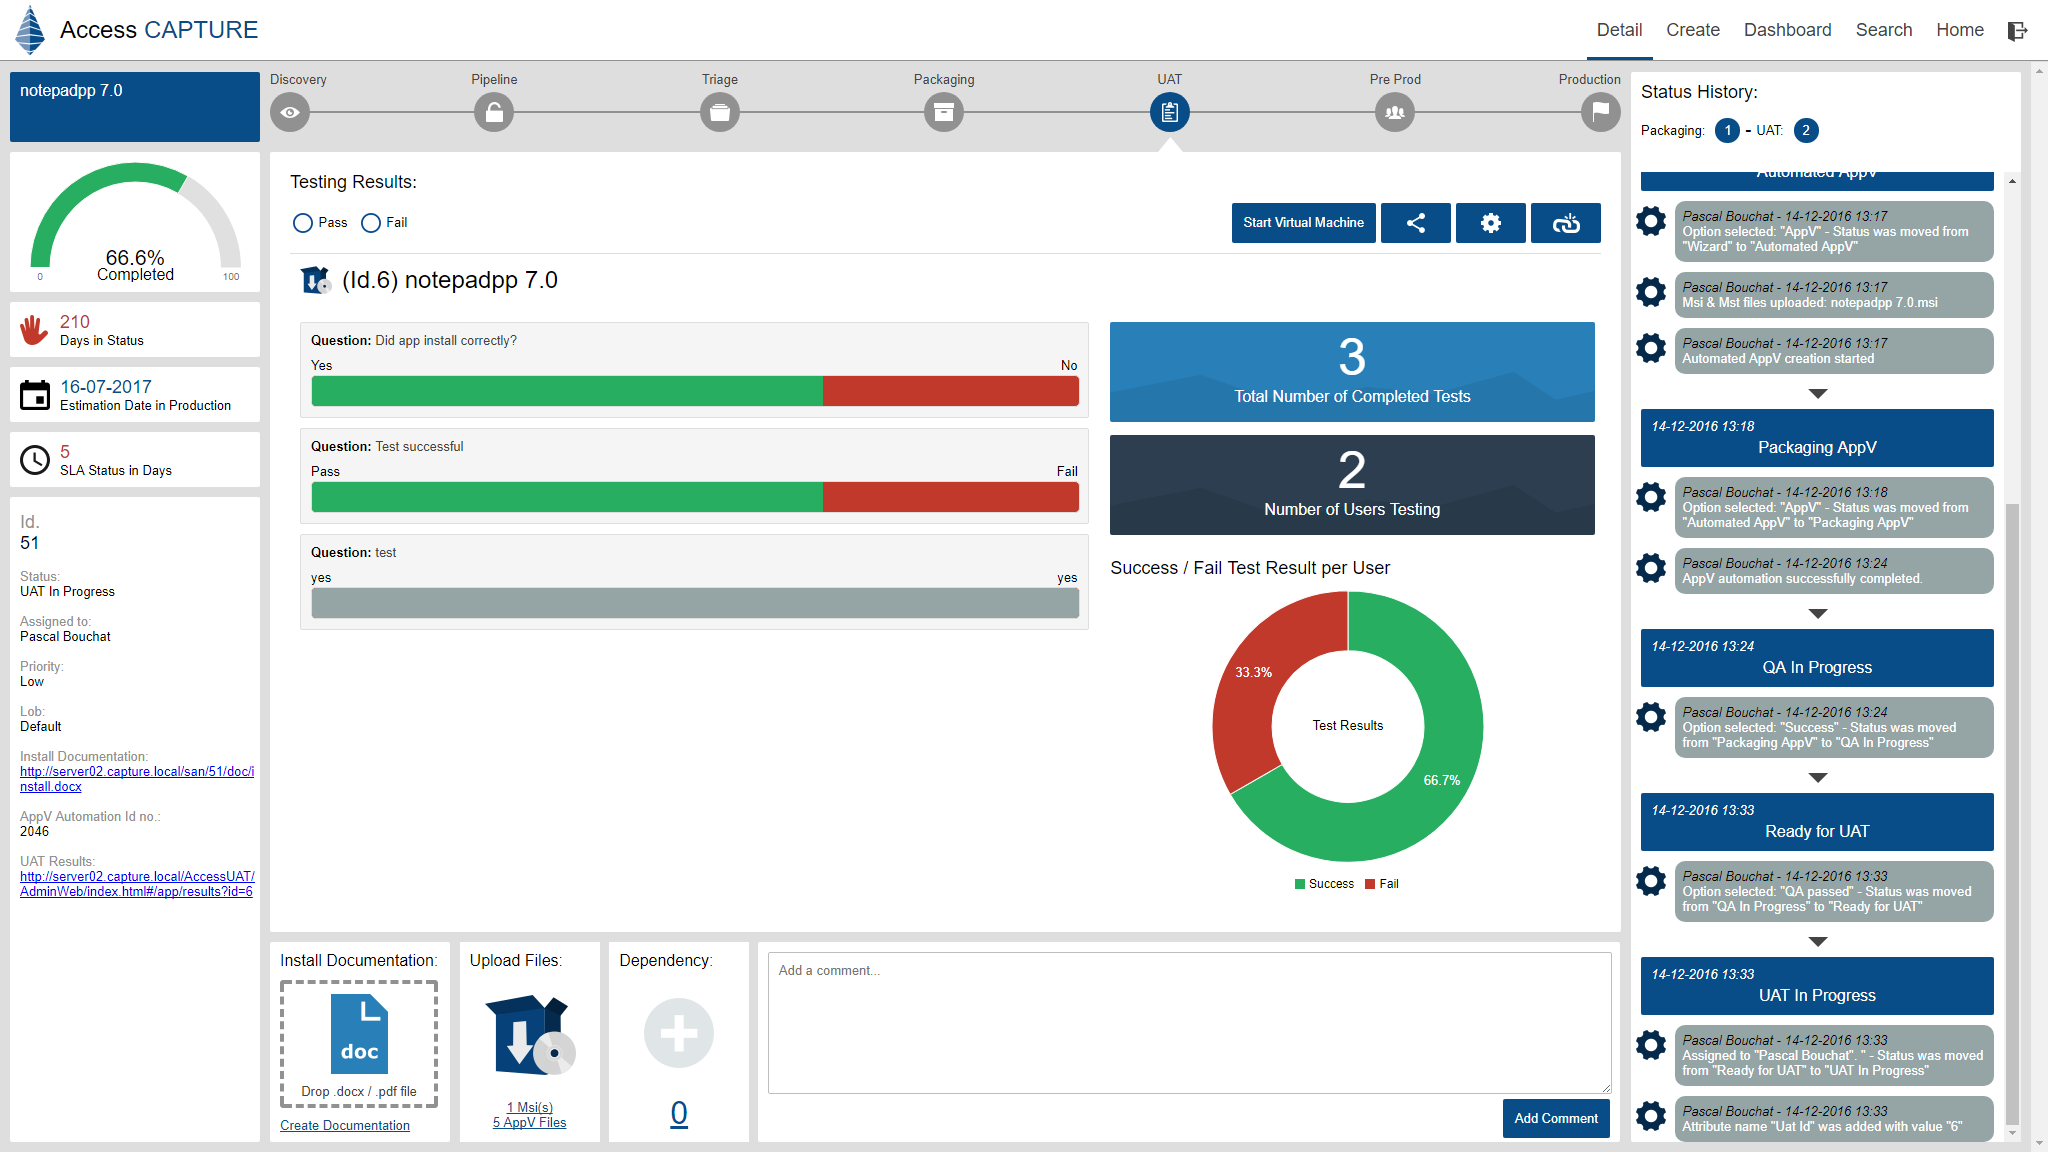
With the help of Access CAPTURE, you can not only spin up pools of virtual machines running the lastest Windows 10 build and install existing apps for product owners to test, but also track and manage the application re-certification process efficiently. This enables you to minimize any possible business disruption caused by older applications that do not function in this new environment.
Once all apps are tested and you are ready to move into deployment, you can do that by using an IT Transformation Project Management Tool, like Juriba Dashworks, to plan the logistics of your mini-migration, e.g., gain exact insight into all the dependencies of your estate, assign users based on rule-based workflows and capacity restrictions, automatically communicate with users and allow them to validate data and pick migration slots within their deployment ring.
Once a migration date is scheduled, Access AGENT can listen for the trigger and kick off the deployment for a batch of users at their assigned date automatically. This can either happen through an API integration with a tool like Dashworks or in collaboration with SCCM.
Finally, when the user powers up his or her freshly upgraded machine for the first time, you can use AGENT to run him or her through a sign-off process. This not only ensures that everything works as it should, but also trains the user indirectly.
To learn more about how Access AGENT and Access CAPTURE can streamline your Windows 10 deployment, schedule a consultation with us. We will walk you through different deployment options and scenarios and can help you determine which option is right for your organization.